How to Pick The Best Barbecue Equipment For Your Smoker

wet bulb socksDid you know the barbecue equipment you choose to smoke with can make or break your success?

Barbecuing meats has been around since the dawn of civilization. It harkens back to times where humans had no other choice but to cook meat over an open fire.

That’s probably why almost everyone still loves it, even in 2017.

Without the right barbecue equipment for your smoker, however, you might be leaving a lot of great flavors off the table.

In this article, we’ll take a look at the equipment you need for your commercial smoker that can set you apart from your competition.

Let’s take a closer look.

Types of Smokers and Upgrades

Generally speaking, there are 4 kinds of smokers used in commercial smokehouses.

The type of equipment you need will vary based upon the smoker you use.
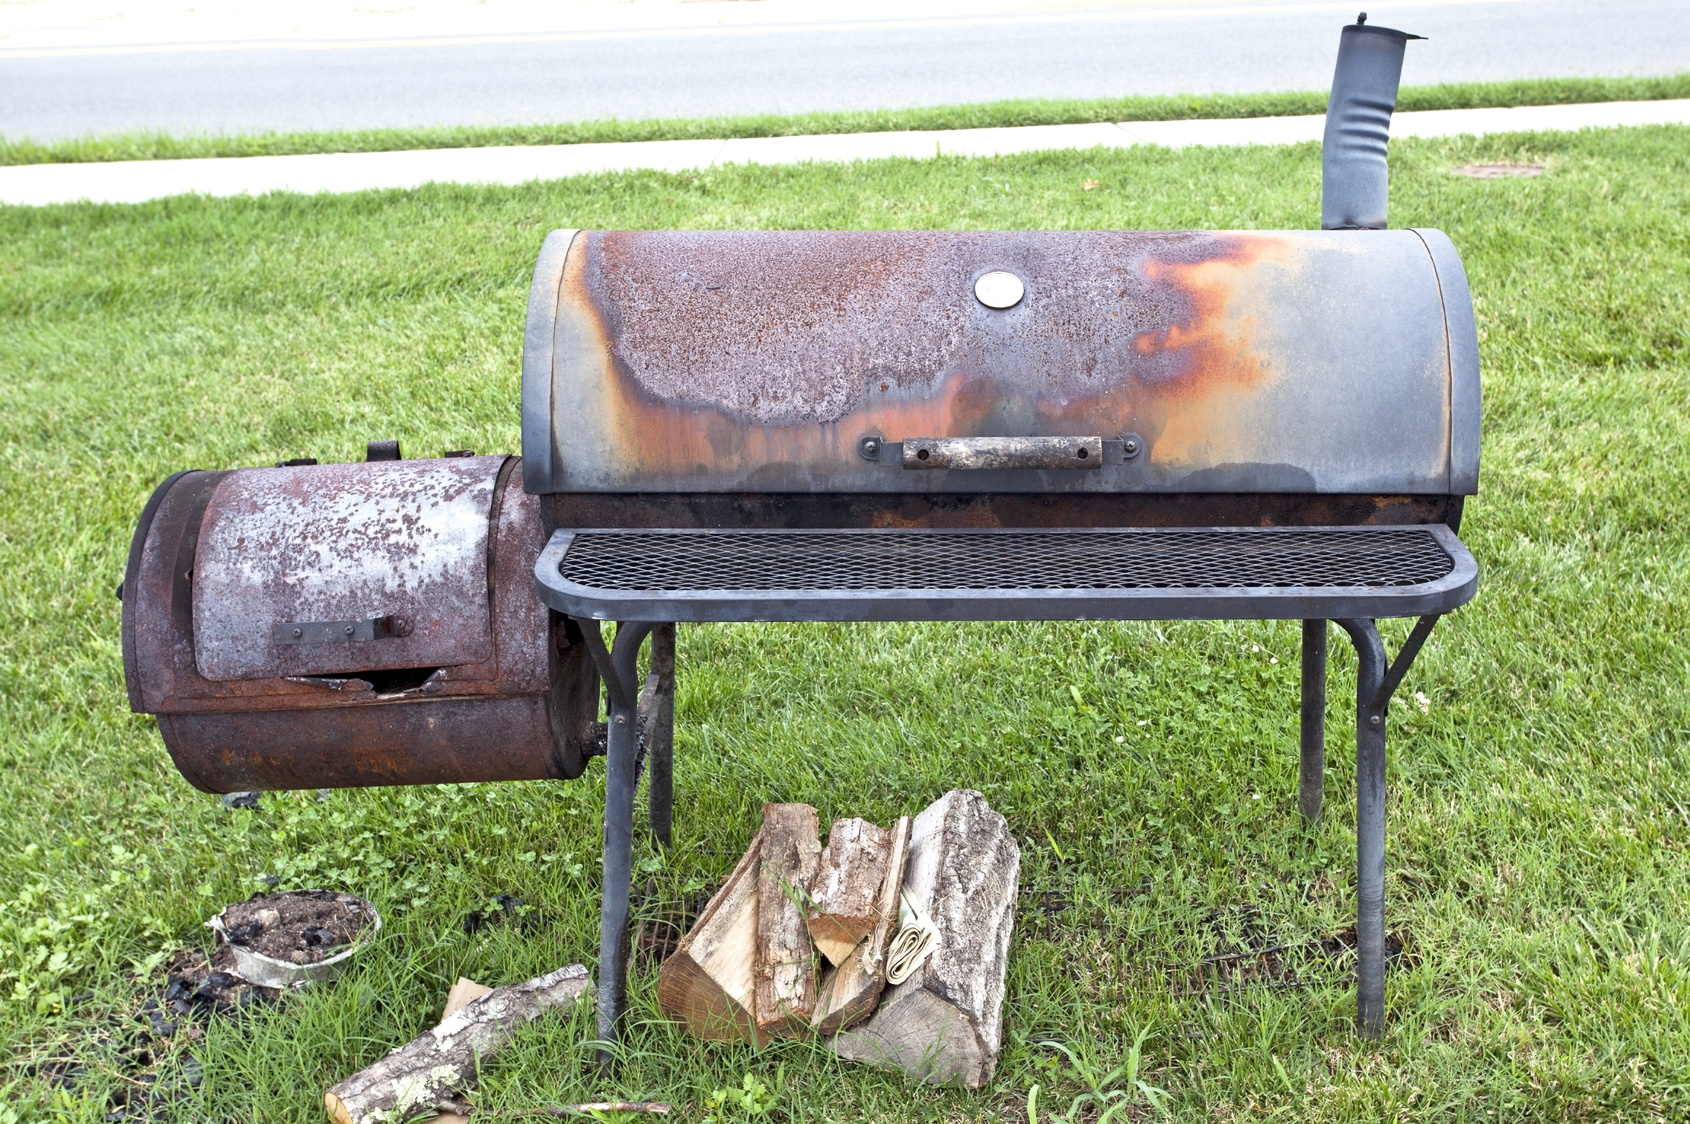
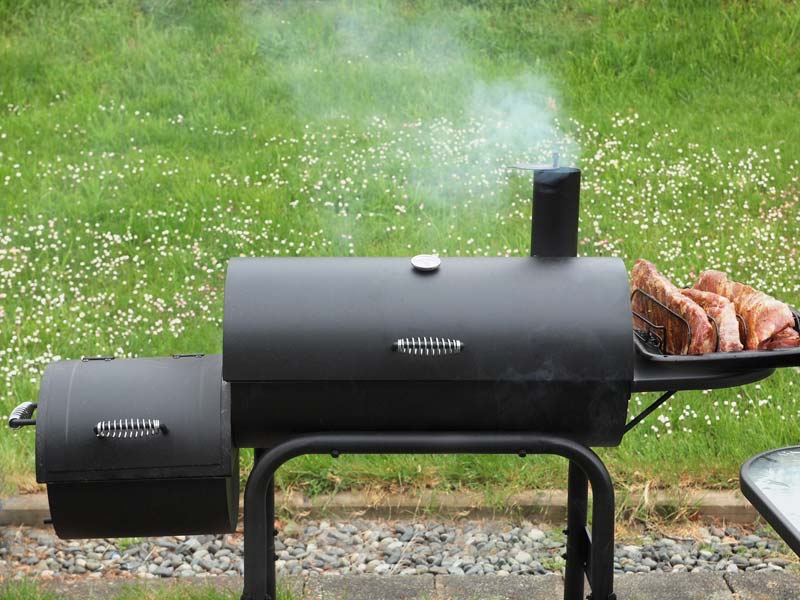
  1. Offset Smoker

This is the most commonly used smoker. It’s normally a cylinder shape with a small fire box at the end, which is attached to the bottom.

You’ll start a small fire in the fire box, which has air-tight controls. The heat and smoke get drawn from the pipe into the smoking chamber.

Barbecue equipment upgrades include:

  • Reverse flow offset
  • Deflector, duct or convention plate
  • Mud pan charcoal fuse
  • Chimney cap
  1. Upright Drum Smoker

This is an upright steel drum that can vary in size. It contains a base to hold your charcoal at the bottom and cooking rack(s) at the top.

The air is controlled through an intake at the very bottom of the drum.

Equipment upgrades include:

  • 2″ air inlet or exhaust
  • 55-gallon stainless steel shelf
  • Curved mount drop handle basket
  • Wet bulb socks
  1. Propane Smoker

This type of smoker gives you a lot more control over the smoking environment.

The heat for the smoker is created by a gas burner located directly under a steel (or iron) box that contains the charcoal or wood, which then provides the smoke.

The box contains a few holes on the top only. This serves to “starve” the wood or charcoal of oxygen to create smoke rather than fire.

Equipment upgrades include:

  • Replacement gasket to better seal the doors
  • Bricks at the bottom to retain and distribute heat more evenly
  1. Commercial Smoking House

These smokers are made from beautiful stainless steel. The smoking generator utilizes friction, an electric coil or a small flame that ignites sawdust whenever needed.

The heat from the steam coils is balanced with water sprays to help perfectly control humidity and temperature.

Barbecue equipment upgrades include:

Smoke Your Competition Away

When you’re ready to smoke out your competition, it’s time to make upgrades to your smoker. After all, the better flavor you produce, the more customers you’ll get (and keep).

Browse our extensive list of parts and products to find the best equipment to help blow your competition out of the water.

No matter what type of smoker you use, you’re sure to find what you need in our shop.

Here’s to the love of smoking!

Smoker Maintenance: Top 5 Parts You Need to Replace

Did you know that 45% of Americans planned on buying a new smoker or grill last year?

There’s a reason! Smokers have become more popular, especially during the summertime for all those outdoor BBQs.

The smoker helps create that delicious BBQ taste. But if you’ve noticed your smoker hasn’t been working the same, it might be time to replace some parts.

Read on to learn more about smoker maintenance tips.

Remember to consult your manual when removing or replacing any parts on your smoker. If you cannot find your manual, be sure to contact the manufacturer or check their website.


1. Sealing Your Smoker’s Doors

Using your smoker frequently can cause wear and tear on its doors.

The heat in your smoker is key, so make sure heat doesn’t leak out of the doors. If you have a cheap smoker, the metal is likely thinner and not retaining heat as well as it could be.

Fix the doors on your smoker with a silicone seal that can withstand high temperatures. It’s also a good idea to consider buying a gasket seal (for the bottom of the doors) for extra protection.


2. Maintain the Grates

The grates on your smoker go through a lot, so be sure to keep them extra clean. If they’re too far gone and a grill isn’t cutting it, consider replacing them.

While it’s important to have your grates seasoned for cooking, too much grease, oil, and other soot can ruin them.

Cleaning your smoker regularly is important to helping prevent grease and oil buildup, which causes your smoker to run less efficiently. Buildup can also change the taste of your food.


3. Replace the Smoker’s Water Pan

The water pan for your smoker ensures that your meat doesn’t dry out during slow-cooking.

It’s important to maintain a proper level of water in the pan during the smoking process. Make sure to clean this pan afterwards.

After awhile, you might find that it’s hard to scrub the water pan clean due to the accumulation of grease and fat.

This is an easy part to replace, and will help keep your smoker looking fresh and new.

Bonus: You can even use disposable aluminum pans for your water, helping maintain a fresh look each time you use your smoker. These make your cleanups easier too!


4. Wet Bulb Socks

Wet bulb socks are crucial to understanding the temperature and humidity in your smoker.

Replace these with every cook cycle to ensure that you have an accurate temperature reading in your smoker.

Be sure to prep them properly, and place them near the exhaust damper for best results.


5. Metal Radiators and Lava Rocks

Whether your smoker uses metal radiator bars or lava rocks, both require maintenance.

The bars should be cleaned regularly to help prevent soot from getting on your food. If they are made of stainless steel, they will last longer than an enamel surface. These must be replaced frequently.

Similarly, lava rocks absorb grease. You should replace the lava rocks to prevent carbon from affecting the smoked flavor of your food.


Smoker Maintenance Is Key to Having a Long-term Smoker

A smoker is a great investment that will last a long time if you take care of it!

Cleaning it regularly to help prevent buildups of grease, soot, and rust will help prolong your smoker. As you have learned, sometimes parts need to be replaced.

Remember: Smoker maintenance makes for a better BBQ!

How do you practice smoker maintenance? Let us know in the comments box below!

How To Measure the Effectiveness of Your Wet Bulb Socks

Image

Are you trying to get the ideal amount of humidity in your smokehouse?

If the Smokehouse’s temperature is too hot, you’ll dry your meat out too quickly. On the other hand, you can potentially ruin your meats if the humidity is too high.

So how are you able to fix this? Generally, wet bulb socks are used to monitor the humidity and temperature in a smokehouse.

If you’re using these for the first time, you’re going to want to know exactly how effective they are. Thankfully, there’s a way to do this.

Read our guide on measuring the effectiveness of wet bulb socks.

The Wet Bulb Checklist

Prepping the temperature gauge

Remember that you’re not taking the actual temperature of the air within your smokehouse oven. You’re actually looking for the amount of humidity in the air.

To take an accurate reading, you first need to know how to prep your thermometer. Prepping your wet bulb sock to gauge the effectiveness is relatively simple.

First, you’ll need either a thermometer or a thermocouple. Either of these will be effective when you’re taking the temperature. You’ll then need a wet bulb sock.

Submerge the sock in water. This will allow moisture to find its way to the probe. You’ll want to make sure that you’re not placing the probe directly near the sock. Leaving a little space between the two will leave room for proper air circulation.

Where is the ideal spot to place the probe? To ensure the best airflow, you’ll need to place the probe near the exhaust damper.

Now that your wet bulb thermometer is set up properly, you’re ready to gauge the effectiveness.

Understanding how much humidity is present

To understand how effective your gauge is, you’ll need to focus on your wet bulb sock. Simply looking at the sock will tell you the amount of humidity in the air.

If your sock is dry, this means the smoker is dry. Pretty simple, right? The temperature on the thermometer should also read a cooler temperature.

However, if your sock is wet, this means that no air was brought up to the probe. This means the air is too humid. Your temperature gauge will also show the temperature of the air (warmer temperature).

Figuring out the percentage of relative humidity

You can also take the percentage of relative humidity with a wet bulb thermometer. For this, you’ll need a dry bulb thermometer as well.

The dry bulb thermometer is simply a temperature gauge that is not used in connection with a wet bulb sock. It will take the temperature of the air within the space, as opposed to the wet bulb temperature.

Once you have both temperatures, you’re able to compare them on a scale, known as the slide rule. These can often be found online or through a parts company.

Wet bulb socks are a great way to test humidity

The temperature and the amount of moisture in the air is important to know when you’re running a smokehouse. And thankfully, it’s easy to find this information.

Wet bulb socks are an easy tool to use to determine the humidity in the air of your smokehouse. Taking only a few minutes, you can find all the information necessary to smoke quality meats.

If you’re in the need for wet bulb socks, take a look at our collection. We’re here to help, so reach out to us with any questions you may have.


Tips for Maintaining Your Smoker to Perfection

Maintaining Your SmokerTo get the best out of your smoker this summer, annual maintenance is key to preventing the buildup of carbon. The summer heat turns the grease and oils buildup rancid. Those rancid grease and oils vaporize, flavoring your food with carbon, tar, creosote, soot and more. It doesn’t just attach to your food, but also insulates grates, preventing heat from transmitting, thus impacting the cooking ability of your smoker.

To prevent tar, creosote, soot, and more from ruining your next barbecue, it is key to clean your smoker regularly.

In this post, learn what you need to know about maintaining your smoker. These are general guidelines. You should always check your owner’s manual or the manufacturer’s website for specific instructions, as smoker models may vary.

Tools you’ll need:

  • plastic putty knife
  • bucket
  • rubber gloves
  • stir wire brush
  • soft scrub brush
  • sponges
  • steel wool
  • paper towels
  • garden hose with nozzle (or a pressure washer)
  • dish soap
  • cleaner fluid

Cleaning Your Grates

Using tin foil on your grates doesn’t reduce cleaning time, but may actually be damaging your smoker’s plastic dials or its flexible hoses. Foil blocks crucial ventilation, forcing heat out of the knob holes, where it could warp the metal or crack ceramics.

Instead of tin foil, use these tips for cleaning your grates. Remember, the buildup of carbon, soot, creosote and more can appear on the sides and hood. Thin layers of carbon are OK. Thick layers are what reduces the reflectivity and reduce the heat.

Start by scraping the layers of carbon that crack and curl using a putty knife and then vacuum up the scrapings. Hose down the interior, but do so over a drop cloth or on a distant patch of grass. If cleaning near a sewage drain, then check with your town laws regulating the disposal of grease.

A few recommended mild cleansers are Dawn Grill Cleaner and Dawn Power Dissolver. Avoid using an oven cleaner on the interior and cooking surfaces, as it may be too harsh for these areas.
When cleaning the probe of a thermometer, avoid getting water into the dial! Wet bulb socks are one of the most crucial parts of a smoker. Note that each type of smoker has specific parts to avoid or areas of caution, so refer to your model’s care instructions.

Gas Smokers

To disconnect the gas supply and close the valve, turn the knob to the right to tighten and to the left to loosen.

When using water to clean the smoker, remove any electrical parts or cover them with plastic wrap. If you have glass or ceramic infrared burners, read the manual for instructions prior to cleaning.

Clean the louvers that allow exhaust to escape to reduce buildup. Remove the heat diffusers over the burners to scrape down below and in-between. As you clean, inspect the various parts of your smoker. If you notice any cracked tubes, replace them.

Check the gas and air mix on a routine basis to see if they need adjusting. Loosen the set screw on the venturi, fire up the smoker, then rotate it and see if the flame is blue with minimal orange. This is best done at night, when the flame has higher visibility.

Charcoal Smokers

As you inspect your charcoal smoker, the coal grate may appear warped after being used. Do not attempt to straighten it, as the grate may break. As long as it’s not preventing airflow underneath, keep using it.

To remove ashes, scoop them out with a plastic half gallon milk jug (cut in half). Ashes should always go into a metal can, as they hold moisture and can chemically attack steel. Always wait for the ashes to cool before scooping them out.

Pellet Smokers

Do not use water when cleaning your pellet smokers. Digital parts can rust and water can damage parts made of sawdust. Instead, use a shop or handheld vacuum to clean.

If there is any grease/carbon build up beneath the grates, loosen it using a power steamer, then wipe off with a sponge. Clean the thermostat probe and line before cooking.

The Exterior

Avoid using steel wool or metal brushes on the exterior of any smoker. Instead, use a scrubbing sponge, warm water, and dish soap to gently scrub away the grime. Use a small amount of vinegar or diluted ammonia to tackle stubborn stains.

Get the best from your smoker by maintaining it using these simple tips. For more DIY maintenance advice, click here!